The water coming out of your borewell looks perfectly clear, tastes fine, and has never made anyone in the house sick. So why bother testing it? Because the things that actually matter in well water, bacteria, nitrates, arsenic, fluoride, excess hardness, are almost all invisible, tasteless, and odourless. I learned this the hard way. My own borewell water looked crystal clear for years, and it wasn’t until a routine lab test flagged high hardness and a whisper of coliform after a monsoon that I understood how little “looks clean” tells you.
I’m Arjun Mehta, and I’ve spent 15+ years living with my own borewell, pump, and overhead-tank setup. This well water testing guide is the plain-English walkthrough I wish someone had handed me on day one: what to test for, how to actually do the testing, how to read the numbers without panicking, and how often to repeat it. No fear-mongering, no lab-speak, just the stuff a real well owner needs to make confident decisions.
Key Takeaways
- Clear, good-tasting water can still be unsafe, the real risks (bacteria, nitrates, arsenic, fluoride) are invisible.
- Every private well should get a full lab test at least once a year, plus a bacteria check after any flooding, repair, or new taste/smell.
- A basic annual lab panel usually costs roughly ₹800, ₹2,500 in India, cheaper than a single doctor visit.
- Test strips and TDS meters are great for quick monitoring, but only a certified lab confirms whether your water is safe to drink.
- Match your test to your risk: bacteria and nitrates for everyone; add arsenic, fluoride, or iron based on your local geology and neighbours’ results.
Why testing your own water is entirely on you
If you’re on a municipal supply, a utility tests that water constantly and answers to a regulator. A private well or borewell has no such safety net. Nobody is quietly checking your water, not the panchayat, not the water board, not the driller who put the bore in. The moment you drink from your own well, you become your own water utility.
That sounds heavier than it is. In practice, “being your own utility” means one honest lab test a year and a few cheap habits in between. The goal of this guide isn’t to scare you into buying a reverse-osmosis system tomorrow. It’s to help you find out what’s genuinely in your water so you only treat the problems you actually have, and stop worrying about the ones you don’t.
New to all this? Start with our plain-English explainer on what’s actually in your well water, then come back here for the full testing playbook.
What should well water be tested for?
You can’t test for everything on the periodic table, and you don’t need to. Focus on water quality testing for the contaminants that are common, harmful, and invisible. I split them into three tiers.
Tier 1: Test every well, every year
- Total coliform and E. coli bacteria, the single most important safety test. Their presence signals surface contamination or a cracked casing, and points to a risk of gut illness.
- Nitrates, usually from farm fertiliser or septic leakage. Dangerous for infants under six months (blue-baby syndrome) and pregnant women.
- pH, very acidic or very alkaline water corrodes pipes and pumps and changes how metals dissolve into your water.
- Total dissolved solids (TDS), a broad snapshot of dissolved minerals and salts. A useful trend indicator, not a safety verdict by itself.
Tier 2: Test based on your region and geology
- Arsenic, a serious natural contaminant in parts of West Bengal, Bihar, Assam, and the Gangetic plains. Odourless, tasteless, and linked to long-term harm.
- Fluoride, naturally high in parts of Rajasthan, Andhra Pradesh, Telangana, and Gujarat. Too much causes dental and skeletal fluorosis.
- Iron and manganese, behind rust-coloured stains, metallic taste, and clogged filters. Common in many borewells.
- Hardness (calcium and magnesium), the culprit behind scale on taps, poor lathering, and short geyser life.
- Uranium, flagged in parts of Punjab, Haryana, and Rajasthan; worth a one-time check if your area is affected.
Tier 3: Test when something specific triggers it
- Lead, if you have old plumbing, brass fittings, or lead-soldered joints.
- Pesticides or volatile organic compounds, if your well sits near farmland, industry, or a fuel station.
- Sulphate and chloride, if the water tastes salty or acts as a laxative.
Tip from my own bore: Before I paid for a big panel, I asked three neighbours what their labs had flagged. All three had high hardness and borderline fluoride, so I added fluoride to my very first test and skipped exotic stuff my area never sees. Your neighbours’ results are the cheapest “local geology report” you’ll ever get.
Understanding your report: what the numbers mean
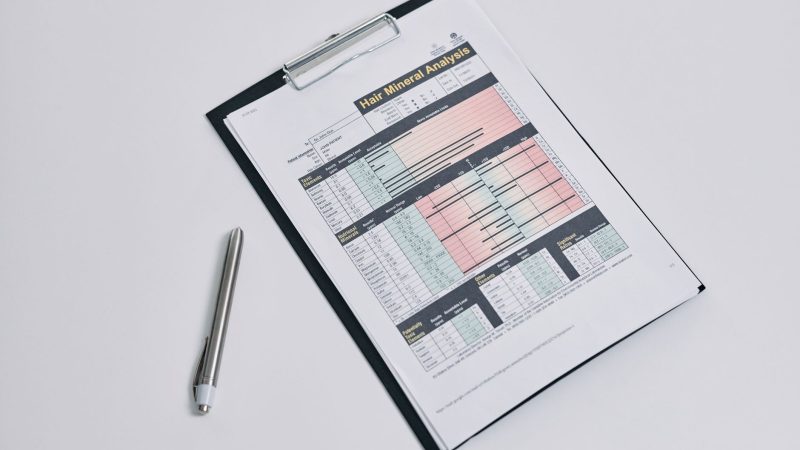
A lab report can look like a wall of abbreviations and decimals. Here’s a friendly reference for the parameters that come up most often, using the Bureau of Indian Standards (BIS) drinking-water limits under IS 10500 as a rough guide. Always read these alongside the lab’s own remarks, and treat them as general orientation rather than a personal medical verdict.
| Parameter | Typical acceptable range (BIS guide) | What it means for you |
|---|---|---|
| Total coliform / E. coli | Should be absent (0) | Any presence means unsafe to drink until treated and re-tested. |
| Nitrate (as NO₃) | Up to 45 mg/L | Above this, avoid giving to infants and pregnant women. |
| pH | 6.5-8.5 | Outside this, water corrodes or scales pipes and fittings. |
| TDS | Below 500 mg/L (up to 2000 permissible) | High TDS often means salty taste and heavy scaling. |
| Total hardness (as CaCO₃) | Below 200 mg/L (up to 600 permissible) | High hardness ruins geysers and leaves white scale. |
| Fluoride | Up to 1.0 mg/L (1.5 permissible) | Excess causes fluorosis; too little is fine to drink. |
| Arsenic | Up to 0.01 mg/L | Serious long-term health risk; needs specialist treatment. |
| Iron | Up to 0.3 mg/L (1.0 permissible) | Above this, expect rust stains and metallic taste. |
Two quick reading habits save a lot of confusion. First, always check the units, mg/L and ppm are effectively the same, but a value in µg/L is a thousand times smaller. Second, “permissible in absence of alternate source” means the water is tolerable, not ideal. For a detailed breakdown of good, borderline, and problem numbers, see our companion piece on whether your well water is safe to drink.
How to test your well water: your three options
When people ask me how to test private well water, they’re usually picturing a lab and a big bill. In reality you have three tools, and the smart move is to use all three for different jobs. Here’s how they stack up.
| Method | What it does well | Rough cost | Best for |
|---|---|---|---|
| Test strips | Instant, cheap screening for pH, hardness, nitrate, chlorine | ₹200, ₹800 per pack | Quick monthly checks and spotting sudden changes |
| Digital TDS / EC meter | Tracks dissolved-solids trends over time | ₹400, ₹1,500 | Monitoring an RO unit or a slowly changing bore |
| Certified lab test | Accurate readings for bacteria, metals, nitrate, fluoride, arsenic | ₹800, ₹2,500+ per panel | The annual safety verdict you actually trust |
My rule of thumb: home tools for trends, labs for truth. A TDS meter tells you something changed; a lab tells you what and whether it’s dangerous. If you want to dig into the trade-offs, we compare them side by side in test strips vs digital meters vs lab kits, and specifically on the safety question in test strips vs certified lab testing.
Choosing your gear
Not all kits and meters are equal. If you’re buying home tools, our roundups of the best home water test kits for well owners and the top TDS meters worth buying will keep you from wasting money on gimmicks. For the annual safety check, a NABL-accredited lab is worth every rupee.
How to collect a sample the right way
Here’s the part almost everyone gets wrong, and it quietly ruins more test results than any lab error: the sampling. A contaminated or badly-timed sample gives you a scary false positive, or a reassuring false negative. Follow these steps for a lab bacteria sample.
- Ask the lab for a sterile sample bottle for bacteria testing. Never reuse a soft-drink or water bottle, it can add its own bacteria and void the result.
- Pick a tap closest to the wellhead or tank outlet, ideally before any filter or RO unit, so you test the raw water.
- Remove any aerator, screen, or hose from the tap. Wipe the outlet and, if the lab advises, sanitise it with a flame or alcohol wipe.
- Run the water for 2-3 minutes to flush standing water out of the pipes. For a general chemical sample, run it a little longer.
- Fill the bottle without touching the inside of the cap or the rim, leaving the small air gap the lab asks for.
- Cap it, label it with the date and tap location, and get it to the lab within the time window they specify.
- Keep the bacteria sample cold, a cool box with ice packs, and deliver it fast. Bacteria counts change if the sample sits warm for hours.
Learn from my mistake: My first bacteria test came back “positive” and I nearly panicked, until the lab asked how I’d sampled. I’d filled the bottle straight after touching the tap with dirty hands, then left it in a hot car for three hours. A clean re-sample came back completely clear. Sampling technique matters as much as the test itself.
We’ve gathered the full pre-test routine in our complete well water testing checklist, and the traps to dodge in common testing mistakes that ruin your results. Ten minutes with those two will save you a wasted lab fee.
Testing for specific contaminants
The two tests every well owner should master are bacteria and nitrates, because they’re the most common and the most time-sensitive.
Bacteria and coliform
Coliform bacteria themselves may not make you ill, but they’re a red flag that surface water, and possibly harmful pathogens, is reaching your well. E. coli is the more direct warning. You can screen at home with a presence/absence kit, but confirm anything positive with a lab. Our step-by-step walkthrough on testing well water for bacteria and coliform covers the home method in detail.
Nitrates
Nitrate is the contaminant I’d never skip if you have infants, are pregnant, or live near farmland or septic tanks. Home strips give a quick read, but a lab number is what you act on. The simple method is laid out in our guide to testing well water for nitrates.
How often should you test private well water?
The short answer for well water safety: a full lab panel once a year, plus extra bacteria checks whenever conditions change. In India, the monsoon is the big variable, flooding, runoff, and a rising water table can push surface contamination into a bore almost overnight.
- Once a year: full panel, bacteria, nitrate, pH, TDS, hardness, plus your region-specific parameters.
- After the monsoon: a bacteria and nitrate re-check, since this is when contamination spikes.
- After any repair: whenever the pump, casing, or pipes are opened, bacteria can enter, test before you trust it again.
- On any change: new colour, smell, taste, cloudiness, or a family member’s recurring stomach upset.
- Before a new baby: a fresh nitrate and bacteria test before bringing an infant home.
For a month-by-month plan tuned to Indian seasons, follow our seasonal testing schedule for India.
What testing actually costs, and why it’s worth it
People delay testing because they assume it’s expensive. It isn’t. A basic annual lab panel in India typically runs ₹800, ₹2,500; adding arsenic, fluoride, or a metals scan pushes a comprehensive panel toward ₹3,000, ₹6,000. Home tools are a one-time spend of a few hundred to about ₹1,500.
Weigh that against the alternative: a needless RO system bought on a salesman’s scare story, a geyser destroyed by hardness you never measured, or a bout of illness. Testing tells you which problems are real so you spend only where it counts. We break down the numbers in our real cost of well water testing guide.
Clearing up common myths
A few beliefs cause well owners real trouble. “Deep borewells are always safe”, depth reduces some surface contamination but does nothing for natural arsenic or fluoride. “Boiling makes any water safe”, it kills bacteria but concentrates nitrate, arsenic, and fluoride, sometimes making them worse. “A low TDS reading means safe water”, TDS is blind to bacteria and many toxic metals. We tackle these and more in water quality myths vs facts.
Want to see how the different methods really compare on the same water? I ran my own borewell through strips, a meter, and a lab side by side, and wrote up exactly where they agreed and clashed in I tested my borewell water three ways.
For the wider public-health picture, the World Health Organization publishes drinking-water quality guidelines, and India’s Central Ground Water Board maps regional groundwater contamination worth checking for your district.
Frequently Asked Questions
How do I test my well water quality?
Use two layers. For quick, ongoing checks, keep test strips and a TDS meter at home for pH, hardness, and dissolved solids. For the real safety verdict, send a properly collected sample to a NABL-accredited lab once a year for bacteria, nitrate, and any region-specific contaminants like fluoride or arsenic.
What should well water be tested for?
Everyone should test for coliform bacteria, E. coli, nitrate, pH, and TDS. Add region-specific tests based on local geology: arsenic in the Gangetic plains, fluoride in parts of Rajasthan and the south, plus iron, manganese, and hardness where staining or scaling appears. Ask your lab which local risks matter most.
How often should private well water be tested?
Run a full lab panel at least once a year. Add a bacteria and nitrate re-check after the monsoon, after any pump or plumbing repair, and any time the water changes colour, smell, or taste. Test again before bringing a new baby home, since infants are most sensitive to nitrate.
Can I rely on home test strips instead of a lab?
Strips are excellent for spotting changes and monitoring between lab visits, but they can’t reliably confirm bacteria or measure trace metals like arsenic. Treat home tools as an early-warning system and use a certified lab for the decisions that affect drinking-water safety. Both together beat either one alone.
Is clear, good-tasting well water automatically safe?
No. Bacteria, nitrate, arsenic, and fluoride are all invisible, tasteless, and odourless at harmful levels. Clarity only rules out obvious sediment and cloudiness. The only way to know your water is safe to drink is a proper test, appearance and taste tell you almost nothing about the real risks.
The practical upshot
Testing your well water isn’t a chore for water-obsessed engineers, it’s the one habit that turns guessing into knowing. Once a year, collect a clean sample, send it to a trusted lab, and read the report against the ranges above. Keep a strip pack and a TDS meter around for the months in between. That simple rhythm is all it takes to drink from your own bore with genuine confidence.
If any single result worries you, don’t rely on a blog post, confirm it with a certified lab and a qualified water professional before acting. When you’re ready to go deeper on any single test, method, or number, this guide links out to the whole Water Testing & Quality library we’ve built for well and tank owners. Start with the test that matches your biggest worry, and work outward from there.