You hear it before you see it: a steady trickle down the outside wall, or a wet patch spreading across the roof slab at 6 in the morning. That is your overhead tank spilling through its overflow pipe, and every litre is water you paid a pump to lift. I am Arjun Mehta, and in 15+ years with my own borewell, pump, and overhead tank, the most common repair call I get from neighbours is a water tank overflow fix that turns out to be one tired part: the float valve at the inlet. This guide shows you how to spot the fault, adjust it in minutes, and replace it cleanly when adjusting is not enough.
Key Takeaways
- An overflowing tank almost always has a float valve that no longer seals the inlet.
- Many overflows are fixed for free by lowering the shutoff point or clearing scale off the valve.
- A replacement float valve costs about ₹80 to ₹700 and the job takes 20-30 minutes.
- Match the new valve to your inlet size (usually ½ inch or ¾ inch) and line pressure.
- Where a pump feeds the tank, an electronic auto shutoff stops overflow even if the float fails.
Why does my water tank keep overflowing?
The float valve is your tank’s automatic off switch. As the water rises, a hollow ball lifts a lever arm that presses a small washer against the inlet to stop the flow. When the level drops, the float sinks and water comes in again. A simple, reliable design, until one part wears out.
An overflowing overhead tank means that seal is never fully closing, so water keeps entering and escapes through the overflow pipe instead of the tap. My primer on how home water storage works lays out the whole inlet-outlet-overflow loop. Before buying anything, work out which fault you have: a float valve not shutting usually traces to one of a handful of causes.
- Worn inlet washer. The rubber seal hardens or splits and can no longer block the water, even with the arm fully up.
- Waterlogged float ball. A cracked ball fills with water, sinks, and never rises enough to trigger the shutoff.
- Arm set too high. The valve closes, but only above the overflow pipe, so it spills first.
- Scale on the piston or seat. Hard water leaves mineral crust that stops the valve seating cleanly.
- Wrong pressure rating. A pump pushing hard on a low-pressure valve forces water straight past the washer.
Adjust or replace? Read the symptom first
Not every overflow needs a new part. Match what you see to the likely fix before climbing up with a wrench.
| What you notice | Likely cause | First fix to try |
|---|---|---|
| Tank fills fully, then spills a little | Arm set slightly too high | Lower the arm or adjuster (free) |
| Valve never quite stops, slow drip past it | Worn washer or scale | Clean, then replace the washer |
| Float ball sits low or feels heavy | Cracked, waterlogged ball | Replace the ball or whole valve |
| Brass valve stiff, corroded, or seized | Age and mineral corrosion | Replace the full float valve |
| Pump feeds tank, valve blasts open | Pressure too high for the valve | Fit a high-pressure or electronic valve |
How to adjust the float valve (the free fix)
Try this first. On my own tank, roughly half the overflow calls I have answered were solved here with no new parts. Aim to seal the valve about 2 inches (5 cm) below the overflow pipe.
- Switch off the pump and inlet so nothing surges in while your hands are near the valve.
- Open the lid and find the valve at the inlet, with its arm and ball resting on the water.
- Check the ball. Lift it out and shake it. Water inside means it is cracked and needs replacing; a sound ball feels light and hollow.
- Lower the shutoff point. On older brass units, gently bend the arm downward. On newer valves, turn the plastic adjuster screw to drop the level.
- Test the fill. Reopen the inlet and watch where it stops. It should shut off a hand’s width below the overflow, with no drip past the valve.
Tip: Before replacing any float valve, I scrub the inlet seat with an old toothbrush. On hard borewell water, a thin white ring of scale is often the only thing stopping the washer from sealing, and ten seconds of cleaning has saved me a valve swap more than once.
How to replace a tank float valve
If the washer is shot, the body is corroded, or the ball is waterlogged, a full ball valve replacement on the tank is the lasting fix.
- Turn off and drain below the inlet. Shut the pump and inlet valve, then run a tap until the water sits below the float valve.
- Note the size and thread. Most home tanks use a ½ inch or ¾ inch inlet. Check whether yours is a side-entry or bottom-entry fitting before you buy.
- Remove the old valve. Loosen the backnut inside the tank wall, then unscrew the valve body from the inlet pipe.
- Wrap the threads. Wind 5-6 turns of PTFE (plumber’s) tape clockwise around the male thread so the joint seals without cracking the fitting.
- Fit the new valve. Screw it in hand-tight, snug the backnut, and set the arm so the ball rides level and clear of the wall.
- Restore water and fine-tune. Open the inlet, adjust the shutoff level as above, and check the joint for leaks once the tank is full.
Choosing the right replacement valve

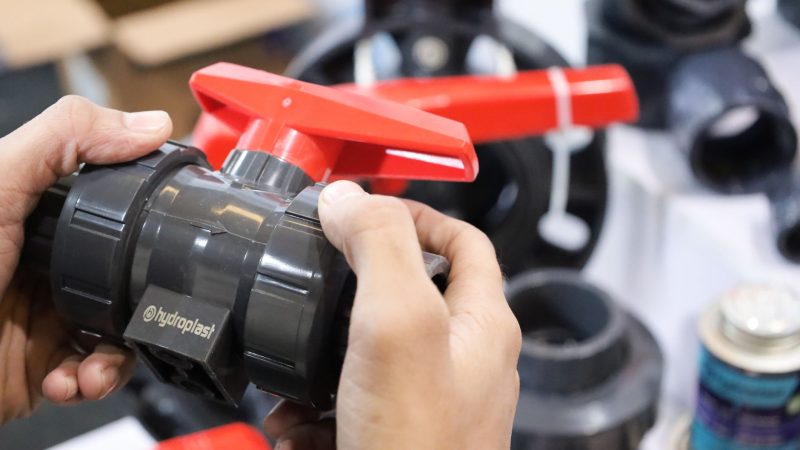
Plastic is cheap and fine for gravity-fed municipal tanks; brass handles higher pressure and hard water far better. Where a pump fills the tank, an electronic auto shutoff tank valve stops overflow even if a mechanical float ever fails.
| Valve type | Rough cost | Best for |
|---|---|---|
| Plastic (PVC) float valve | ₹80 to ₹250 | Gravity-fed municipal tanks, low pressure |
| Brass float valve | ₹250 to ₹700 | Hard water, higher pressure, long service life |
| High-pressure diaphragm valve | ₹350 to ₹900 | Booster-pump or direct-fed tanks |
| Electronic water level controller | ₹1,200 to ₹3,500 | Pump-fed tanks wanting full auto shutoff |
When I swapped the flaking plastic valve on my overhead tank for a brass one, the overflow stopped for good and the part has held for years on gritty borewell water. A plumber charges roughly ₹200 to ₹500 in labour on top of the part, but the swap is well within reach for most homeowners. Fixing the overflow does not clean the tank, so pair it with your schedule for cleaning a water storage tank and, when needed, disinfecting it the right way.
Wasted overflow adds up beyond your own bill: India’s Central Ground Water Board tracks how fast groundwater is drawn down, and a tank spilling an hour a day is a real loss over a year. My tank maintenance checklist keeps the float valve on the seasonal list to eyeball.
Frequently Asked Questions
Why does my water tank keep overflowing?
It keeps overflowing because the float valve is not sealing the inlet, so water enters faster than the shutoff can stop it and escapes through the overflow pipe. The usual causes are a worn washer, a cracked waterlogged float ball, scale on the seat, or an arm set too high.
How do I replace a tank float valve?
Shut off the pump and inlet, drain the tank below the valve, then loosen the inside backnut and unscrew the old body. Match a new valve to your inlet size, wrap the threads with PTFE tape, fit it hand-tight, reconnect the ball arm, and adjust the shutoff level once water is restored.
Can a float valve be adjusted instead of replaced?
Often, yes. If the valve still seals but stops too high, simply lowering the arm or turning the adjuster screw so it shuts about 2 inches below the overflow fixes the spill for free. Adjustment will not help a split washer, a corroded body, or a waterlogged ball, which need a new part.
Will an electronic auto shutoff stop overflow better than a float valve?
For pump-fed tanks, often yes. A water level controller senses when the tank is full and cuts power to the pump, so it does not rely on a washer holding back pressure. It costs more upfront but guards against both overflow and running the pump dry. Many owners fit one alongside a float as backup.
Putting it together
An overflowing tank looks like a plumbing emergency, but it is usually one small part asking for attention. Check the float and its washer, lower the shutoff point, clean off any scale, and replace the valve if the fix does not hold. Twenty minutes and a part under ₹700 stops the wasted water and the damp ceiling. A working valve says nothing about water quality, so confirm safety with a certified lab when it matters.
Want the rest of your storage setup running just as smoothly? Our complete guide to water storage tanks and distribution ties the pump, tank, valves, and pipes together so the whole system behaves.